

How to Take Better Photos | 6 Simple Photography Tips Anyone Can Try
Whether it be by phone or camera, the vast majority of us take photos regularly. We document our daily lives, create reels, share ideas and even cultivate livelihoods from the content we share online.
But with everything that is constantly streaming among all platforms, the desire to stand out is more prevalent than ever before. What can be done to change up our content so that it doesn’t drown in the white noise that is social media?
I’m here to help!
Listed below are 6 easy, user friendly tips that anyone, on any device, can use immediately to change up their photo-taking game.
These tips are tried and true through years of experience and schooling.
Read through, and try them out for yourself!

1. Perfect lighting is EVEN lighting.
Whether you prefer sun lit photos, or shade, perfect lighting is EVEN lighting. Avoid harsh contrasts of highlights and shadows on your subject, especially if you’re photographing people or taking a selfie. Look out for speckled light that often happens under tree cover.
Tip : Look at the ground. If you see speckled light on the ground, (small areas of bright light mixed with shadows), more than likely those speckles will also appear on your subject’s face. However, this is not always the case. Take a test shot in your desired spot and adjust as needed.
The mother and daughter pictured here were captured under tree cover. There were speckles on the ground, but I loved the area and moved them slightly until the speckles did not show on their skin. Often, all it takes is a small shift in position to achieve the right look.

2. Keep an eye on the sun.
Different times of the day will produce different looks because of the sun’s placement in the sky. Generally speaking, the best time of day to capture photos is during golden hour, however, all of us capture quick snaps throughout the day depending on what it is that we’re doing. So what can you do to create the best possible image for any time of day?
Tip : Do not place yourself or your subject facing the bright sun. Not only will this cause your subject to be overexposed, this will also cause eye squinting. That being said, it is also just as important to NOT shoot into the sun, as well as NOT backlighting yourself or your subject, if possible. This is when the background is brightly lit, while the subject(s) are not. This can cast a haze over your image, as well as cause underexposure your subject. Play with positioning as you are capturing your image. Again, a simple shift or turn can make all the difference!
The family photo shown here was captured at golden hour. Yes, I did shoot into the sun, however the slight tree cover and the softness of the end-of-day light cast a dreamy glow instead of a poor exposure or haze.

3. Straighten your horizon.
As storytellers, our goal is to paint a clear picture; to tell a story well. And a crooked horizon, unless it is artistically intentional, is a distraction from your subject and the story you’re telling.
Tip : Keep your horizon straight. This can be achieved when shot, or in edit. In addition, keep other aspects of your photograph straight, such as walls, frames, and anything else that is pictured that has 90 degree angles. Crooked aspects will give a crooked impression, and will change the viewer’s perspective on the story you’re sharing.
The photograph shared here was shot early in the morning at a local SoCal beach. Even with the fog, the horizon is visible. While the sand in the foreground is a bit slanted due to the waves coming in, the main horizon in the background is straight, which gives this image stability.

4. Limit distractions.
Photographs tell a story. And each photo you take captures a piece of that story. Your subject, regardless of what it is, should be the main focal point in your image. When a photo is cluttered with a busy background, such as people, trees that seem to come out of a person’s head, and various other things, the main subject can become lost.
Tip : A slight shift in position, or a tighter crop may be all your photograph needs to limit the distractions at play in the background. Be mindful of your backgrounds, and make adjustments as needed.
The portrait shown here was captured in a field, surrounded by homes, fences, cars, etc. By simply shifting my position so that I was kneeling and shooting up at my subject, as well as cropping in a bit tighter, the background is free from distraction, and my subject is the main focal point of my shot.

5. Frame your subject(s).
The purpose of a picture frame is to draw the eye to the photograph within the frame. The same rings true when you’re capturing an image. Use your surroundings to create a frame around the subject you are photographing. It could be surrounding tree branches, and tree cover, doorways, arches, even buildings.
Leading lines are lines in the background of your image that draw the eye to your subject. These lines can also be used to frame your subject, depending on how you position them.
Tip : Look for spots that can act as a subject frame, or leading line. Be creative!
The couple pictured here requested that their engagement session be captured at their new luxury apartment complex. It was absolutely beautiful! And I wanted to capture as much of the surroundings as I could, while keeping them as the main focal point of each image. This photograph contains subtle framing. The wall to the right, as well as the shorter wall to the left create a less obvious frame around the couple. The trees and foliage surrounding them also help in the framing.
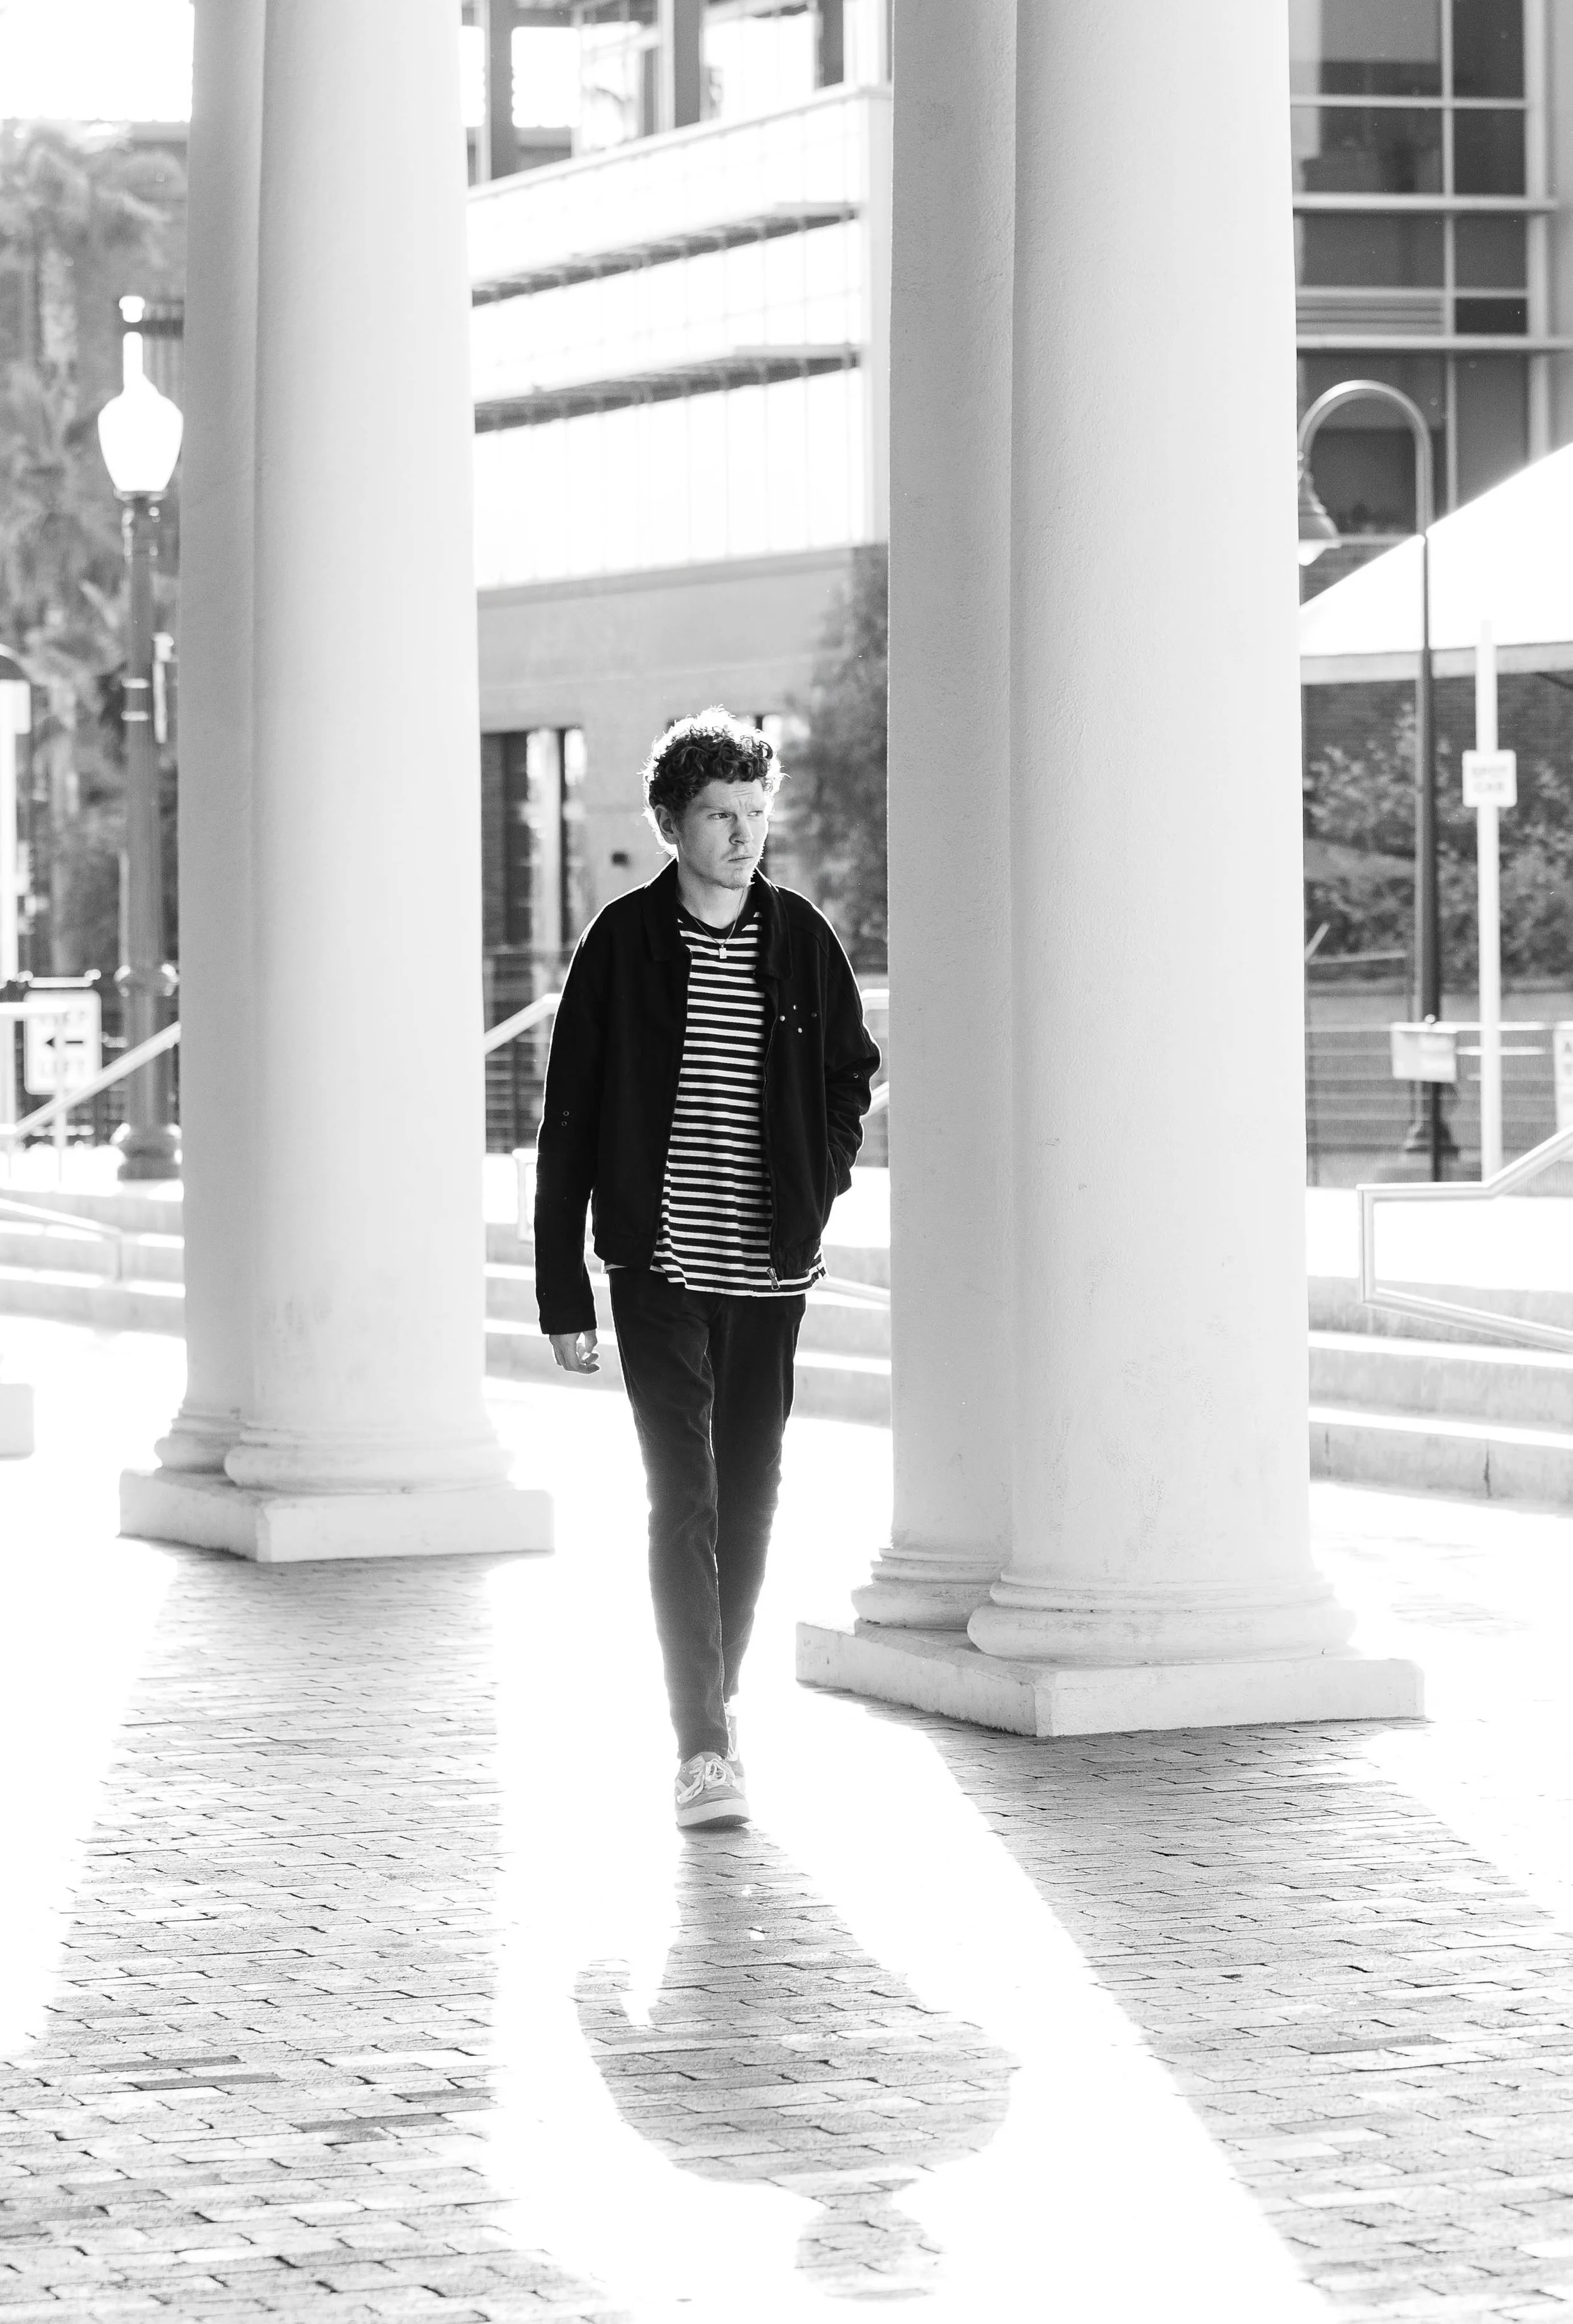
6. Don’t be afraid to use shadows and highlights.
Use of shadows and highlights can add a sense of drama and depth in your photo, regardless of what it is that you’re capturing. Don’t be afraid to utilize your surroundings to create something truly breathtaking!
Tip : Look for areas of deep shadows and soft highlights. Windows are great for this type of shot! As are doorways. Be creative! Just remember to keep your subject the main focus of your image. Putting your subject in an area of highlight is a great way to achieve this!
The photo shown here was captured at a local train depot. I was obsessed with the shadows and highlights created by the pillars, and had my son walk slowly toward me to showcase the contrast seen here.
The moral of the story here, friends? A few simple tweaks can make all the difference! Remember, the stories you share through your photos are YOUR stories. Don’t be afraid to get creative. And most importantly, have fun! Happy snapping!